Replacing the bushings on the 1993 ZJ rear anti-sway bar
Well, this is a fairly simple procedure but will require jack stands
and taking the rear wheels off (one at a time). This is because the
top
bolts are just easier to get to with the wheels off.
Remember, the body bushings must be tightened after the jeep is off
the jacks.
Here we go.
TOOLS: 15mm deep-well socket, 15mm standard socket, extension bars,
ratchet wrench, breaker bar, torque wrench, crescent wrench.
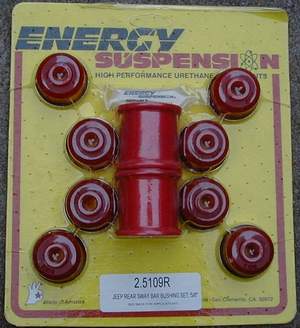
| First off, the busing kit. Energy Suspension (Part# 2-5109R)
from 4 Wheel Parts #13 in Oklahoma City for $27.95. In case your
wondering the R on the end of the part number stands for Red. They
make Yellow also. It actually doesn't matter that much as you have
to be under the Jeep to see anything anyway and unlike rice-mobiles the
color won't make you go any faster. ^_^ |
|
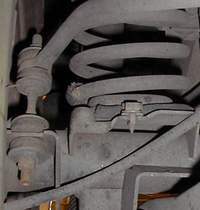 |
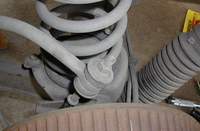
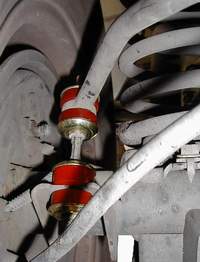
This is a picture of the old passenger side link. As you can
see there isn't much room to work with. The only easy way to get
the top bolt is by taking the wheel off. But let's do that later.
First you need to remove the bolts holding the rear track bar to the body
and the lower mounts holding the link to the axle. This can be done
easily under the jeep without using jackstands. You will need some
extensions and as you can see a deep-well socket (15 mm) to clear the threaded
ends. |
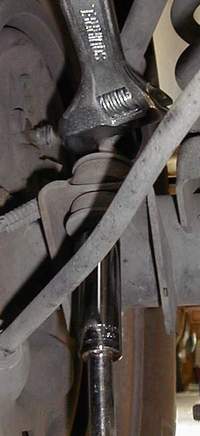
| Now you see why I said you need a crescent wrench. The wrench
fits on the flat spot between the bushings and keeps the whole assembly
from rotating as you take the nuts off. If there is a lot of rust
it is advisable to brush the threads clean with a brass brush or squirt
some PB-Blaster. I just used a breaker bar to get a bit more oomph
behind the bolt and that worked well. You see the deep well socket
and extender on the bottom. Note the wheel is still on. No
need to be under a vehicle on jack stands unless you have to. |
|
 |
This is the old bushing. One of the bolts on mine was real buggered
up as the factory must have cross threaded it. :( Had to go get a
new bolt but fortunately the weldnut was still in good shape. Otherwise
you have to go into that hole there and try to fit a new nut on.
That would not have made me happy. |
| Now that you have all the stuff done under the vehicle it's time to
pop off one of the wheels and get that bolt out of the top. Same
thing as the bottom. Crescent wrench on the flat spot and the 15 mm deep
well on the nut. |
|
|
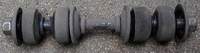
Here is the old link
|
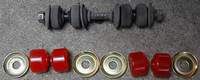
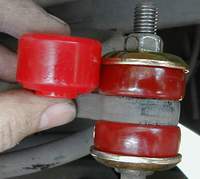
With the new bushings
|
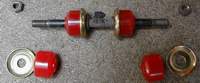
Partially assembled
|
|
|
|
|
As you can see, after torqing the bolt to 27 ft.lbs the bushings flatten
out by about half the original height. It's important to keep the
little shoulder centered in the hole otherwise the assembly will move. |
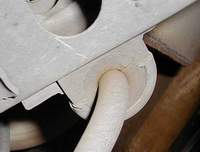
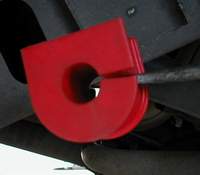
| Now on to the sway bar bushing. You will notice it has a split
and that's how you get it on. But first take a bit of emery cloth and take
off any rust buildup on the bar. Then squirt the hole with the included
goo (assembly lube) and snap it around the bar. Take the metal clamp
and loosely attach it back to the frame. Do not torque! You will
need to do this after the vehicle is on the ground and after you get the
bar centered. |
|
|
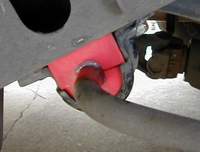
That is what your looking for. Make sure all the bushing is in
there. |
| After you've done both sides it's time to put the wheel back on and
get under the Jeep (lugnuts go to 90-95 ft.lbs). Take a bit
of time and make sure the bar is centered and both link are in the same
relative position. Then slide on the lower bushing and torque the
nut to 27 ft.lbs. (you will need the crescent here too) After your
done with both sides then you go back to the bar bushings and tighten them
to 40 ft.lbs. |
|
Well, that's it. Doesn't take that long and if your old bushings
were showing signs of age like mine you will notice a much better ride
in crosswinds.
--DougW--